Successfully running a molder requires more than just turning on the machine. To get crisp, clean results with every pass, it’s important to focus on several foundational steps. Start with the right tooling and setup. Then, follow up with careful material handling and inspection. Understanding the basics will set you up for success, whether creating trim, casing, or custom molding profiles.
Choosing the Right Profile Knife
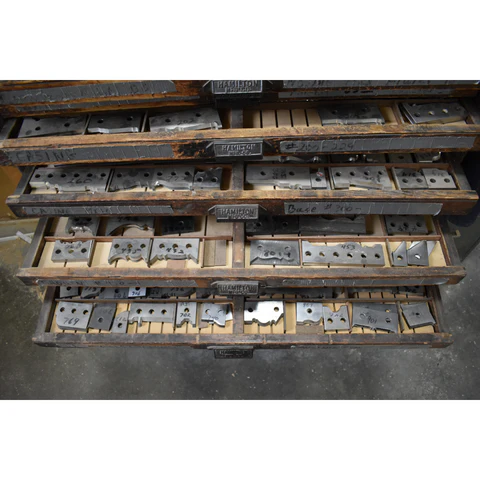
The profile knife is at the core of every successful molding project. At Williams & Hussey, all of our knives are specifically designed to fit our molders for a perfect fit and top performance. Made from M2 high-speed steel (HSS), these knives stay sharp longer, handle high temperatures, and produce clean, consistent cuts across a wide range of wood types.
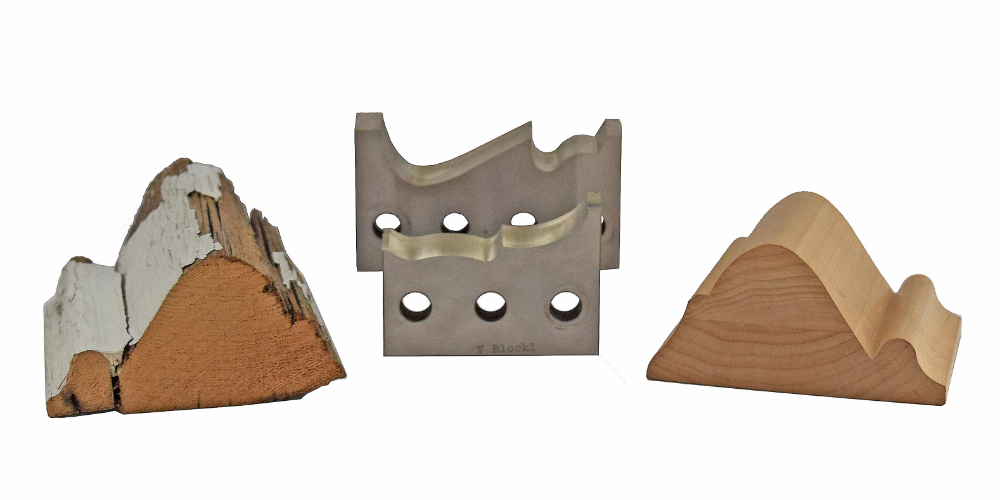
When choosing a knife, it’s important to match the profile to the molding shape you want to create and consider the type of wood you’re using. Hardwoods, softwoods, and figured woods cut differently, so using a high-quality, properly maintained knife is essential.
A dull or mismatched knife can lead to rough finishes, tear-out, or even damage to your machine. For safe operation and the best results, always inspect your knives before use and replace them when needed. The right Williams & Hussey knife will give you smooth finishes and fewer touch-ups.
We offer several hundred standard profile knives, all built to work seamlessly with Williams & Hussey molders. With such a wide selection, you will likely find exactly what you need. If not, we also offer custom knife design. Whether you need to match an existing molding or create something entirely new, we can bring your idea to life.
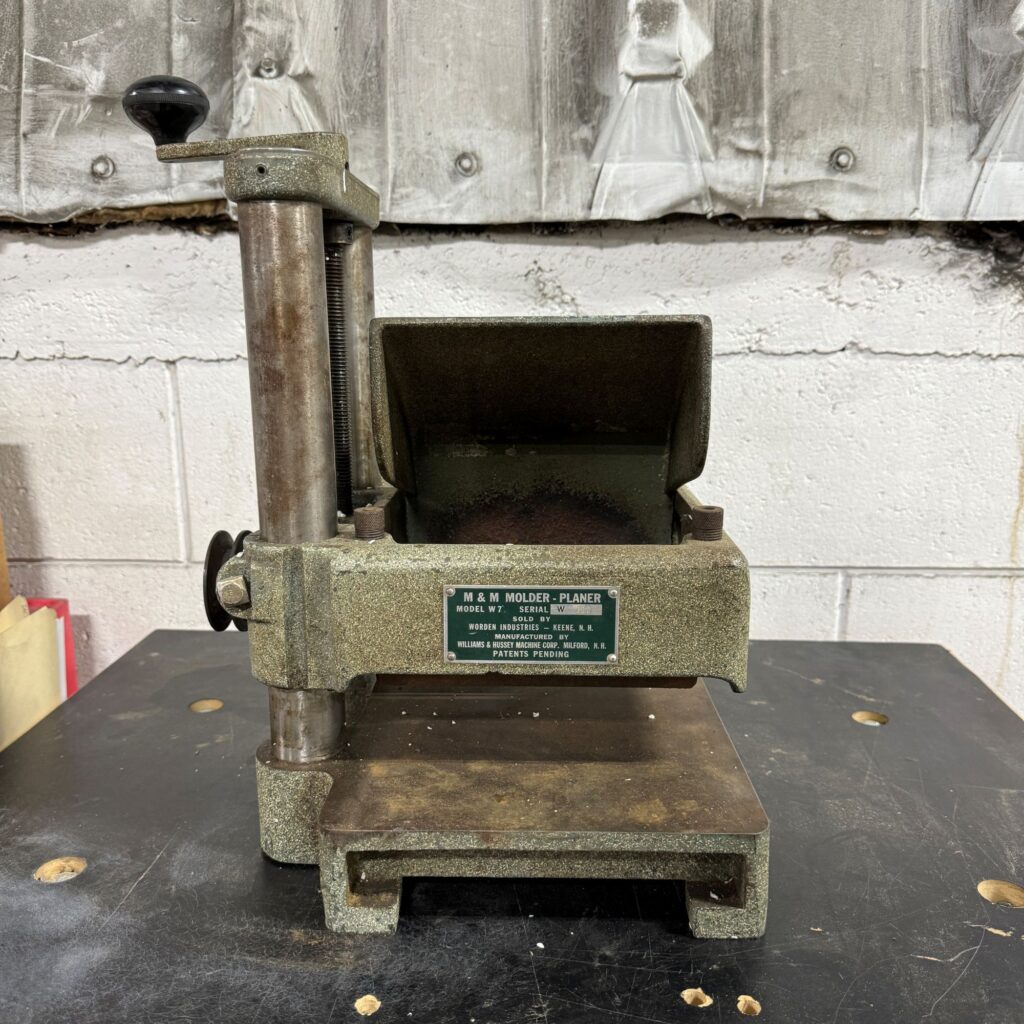
Setting Up the Molder and Knife for Best Results
Accurate setup is key to getting clean, consistent results from your Williams & Hussey molder, and it starts with proper knife installation.
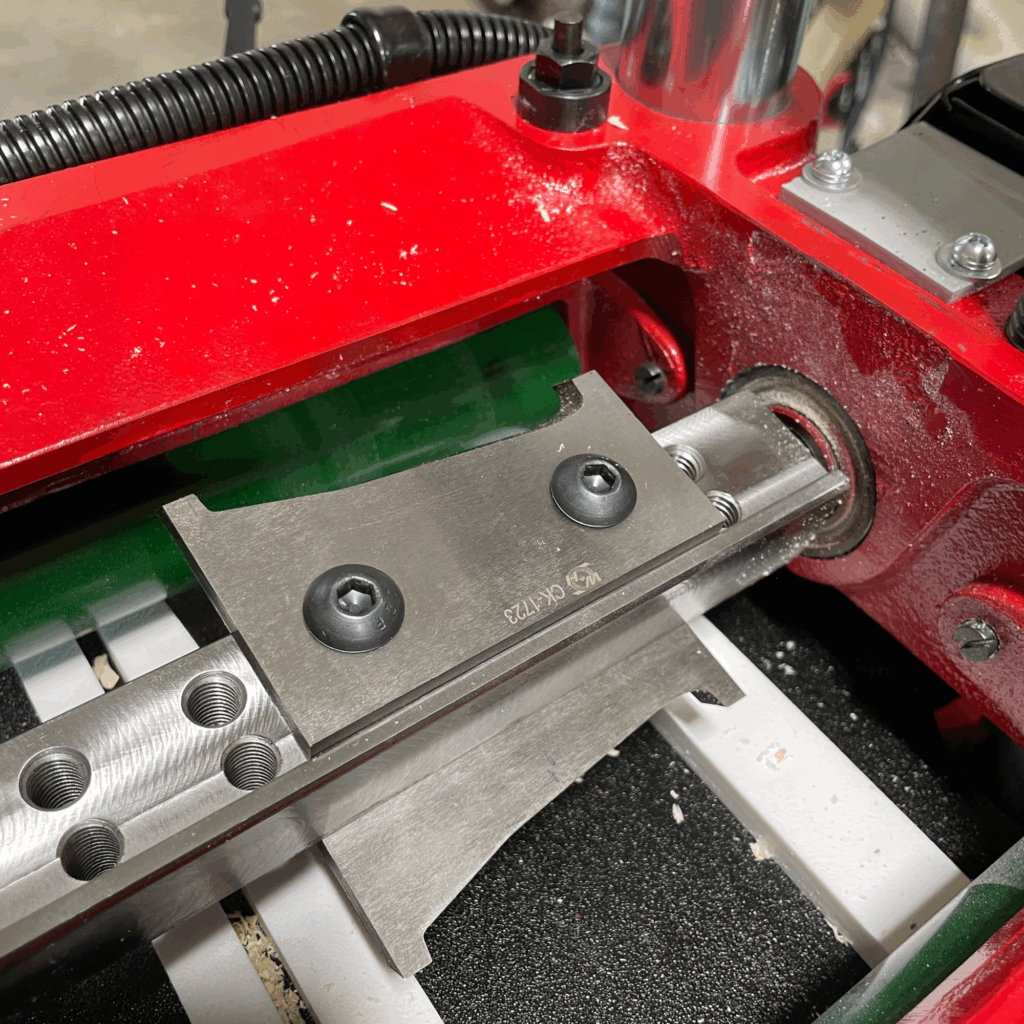
Begin by attaching the knives to the knife arbor.
Position panel knives to the far right, place smaller knives near the post-side mounting area, and center larger knives to maximize roller surface contact. This arrangement helps maintain even pressure and balance during operation.
Next, roll one knife down so it points toward the molder bed.
Place a sample piece of your stock on the bed, align it with the knife profile, and lower the machine head until the roller firmly secures the stock. This step properly aligns the knife with the material for an accurate cut.
Once you install the knife, double-check the alignment in the cutterhead. Misalignment can cause chatter marks, uneven molding, or even damage to the machine or workpiece.
Adjust the feed rate based on the wood type and profile complexity.
Hardwoods and detailed profiles may require a slower feed rate for a smooth finish. During operation, monitor for excessive vibration, which could signal problems with knife alignment, balance, or feed pressure. Addressing vibration early helps extend the life of your machine and ensures consistent output.
Setting up your molder correctly protects your investment and helps you produce professional-quality molding with every pass.
Preparing the Wood
Great molding starts with great wood. Use straight, stable boards free of large knots, warps, or defects. Grain direction matters, too. Select boards with consistent grain to minimize tear-out and produce smoother finishes.
Run your boards through a planer before molding for a flat and smooth surface if necessary. This preparation helps the knife make even contact with the surface and reduces the chance of chatter or gouging. For projects requiring long, continuous runs, edge-gluing boards can help maintain consistent appearance and dimensions.
Feeding the Wood
Feeding technique has a direct impact on molding quality. Feed your boards at a consistent pace, avoiding sudden starts or stops. This process ensures uniform contact between the knife and the wood throughout the cut.
Always use push sticks or other safety tools to keep your hands away from the cutter head. Inspect your feed rollers and ensure they are clean and in good condition to help move boards smoothly through the machine.
Inspecting the Finished Molding
Take time after each run to inspect the finished molding. Look for signs of tear-out, rough edges, or variation in the profile. If issues appear, revisit your setup: a slight change in knife alignment, feed rate, or material prep can often solve the problem.
Quality control ensures that each piece you produce is consistent and professional. It also prevents waste and reduces the time needed for sanding or secondary processing.
Ready to take your molding work to the next level?
Explore our full line of custom and standard profile knives, molder accessories, and helpful resources to get the most out of your Williams & Hussey machine.
Shop Profile Knives or Contact Us to speak with a member of our team.